1. Introduction to Zombie Masks
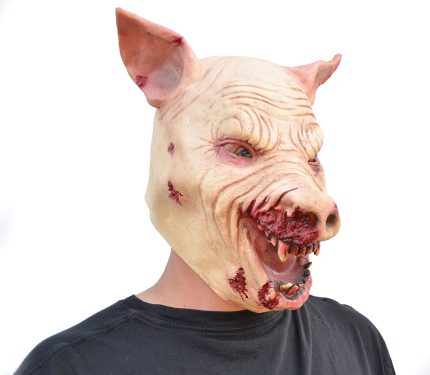
Zombie masks are a popular choice for Halloween, adding a gruesome and terrifying element to your costume. Creating a realistic zombie mask allows you to personalize your look and tailor it to your desired level of horror. In this guide, we’ll walk you through the steps to create an authentic zombie mask, with an additional twist of incorporating a clown mask scare.
2. Gather Necessary Materials and Tools

Before diving into the creation process, gather the essential materials and tools you’ll need:
-
Casting materials:
- Plaster bandages
- Alginate or silicone for mold-making
-
Sculpting materials:
-
- Water-based clay (non-drying)
- Sculpting tools (e.g., wire loops, sculpting knives)
-
Painting and detailing supplies:
- Acrylic paints in various colors (reds, browns, grays)
- Brushes of different sizes
- Sealant spray (clear matte)
-
Miscellaneous:
- Mixing bowls
- Vaseline or petroleum jelly
- Mirror
- Hairdryer
- Clown mask (for the scare element)
3. Sculpting the Base of the Zombie Mask
-
Prepare the model: Start by covering your face with Vaseline or petroleum jelly to protect your skin and hair. Put on a bald cap if needed.
-
Apply alginate or silicone: Apply a layer of alginate or silicone to capture the shape and details of your face. Follow the instructions provided with the material. Alginate is a common choice due to its quick setting time.
-
Apply plaster bandages: Once the alginate or silicone has set, reinforce it with plaster bandages to create a sturdy support for the mold. Ensure it’s thick enough to hold the shape.
-
Remove the mold: Carefully remove the plaster bandage mold from your face, ensuring it retains the shape and features of your facial structure.
-
Sculpt the zombie base: Fill the mold with water-based clay, sculpting the desired zombie features such as sunken eyes, exposed bones, and decaying skin. Use reference images for inspiration and guidance.
-
Let it dry: Allow the clay to dry completely before carefully removing it from the mold.
4. Painting and Detailing for Realism
-
Base coat: Apply a base coat of gray or pale green acrylic paint to mimic the zombie’s complexion. Allow it to dry completely.
-
Add details: Use various shades of reds and browns to create realistic wounds, bloodstains, and decay. Apply the paints strategically to enhance the mask’s gruesome appearance.
-
Define features: Paint sunken eye sockets, exposed bones, and any other specific features you sculpted on the mask. Use dark shades to add depth and shadows.
-
Blend and layer: Blend colors together and layer them to create a more realistic and textured appearance. Experiment with different techniques to achieve the desired effect.
-
Seal the paint: Once you’re satisfied with the painting, seal the mask with a clear matte sealant spray to protect the paint and enhance longevity.
5. Adding Final Touches and Variations
-
Hair and textures: Depending on your zombie character, you can add hair using synthetic or real hair, or create textures with additional sculpting and painting.
-
Accessories and clothing: Consider adding torn clothing, accessories like fake teeth, or other elements to enhance the overall zombie look and provide a unique touch.
-
Integrating the clown mask scare: Attach or overlay a clown mask element to the zombie mask, creating a juxtaposition of horror and surprise. Incorporate clown features such as bright colors, exaggerated features, and a menacing smile.
-
Customize variations: Experiment with different paint colors, features, and clown mask styles to create variations of your zombie clown mask, ensuring a diverse and intriguing collection of scare-inducing masks for Halloween.
By following these steps, you can create a realistic and terrifying zombie mask with an added scare factor of a clown mask, perfect for spooking everyone on Halloween. Happy haunting!
Congrats! You’ve Finished This Blog.


